Quick Tip: Free-hand drawing brushes setup for Illustrator

I bet that when you start drawing in Illustrator you only have a few default brushes that are not really of much use unless you customize them to your drawing style. I will point out the basics in using of brushes to create cool outlines in a short time and also point out different line styles that affect your final outcome. So let’s get started!
First, free-hand drawing. For this, you need pressure-sensitive tablet and specific brushes that modify their thickness along with the pressure you exert on your pen. We will work on this sketch of a bull.

toro Quick Tip: Free hand drawing brushes setup for Illustrator

Open the Brushes window ( Window > Brushes). Double-click a thicker brush and set Diameter to 4 px on Pressure, with variation of 2 px. Leave the rest to Fixed and Roundness to 100%. We use only a small variation to obtain small imperfection that will give the feeling it was hand-drawn. Hit OK. Now double-click another brush and set it to 1.5 px Diameter and set it to 1.5 px Pressure variation. The secret is to use thicker lines on the contour and thinner lines for the details inside it.

brush setting 1 Quick Tip: Free hand drawing brushes setup for Illustrator

brush setting 2 Quick Tip: Free hand drawing brushes setup for Illustrator

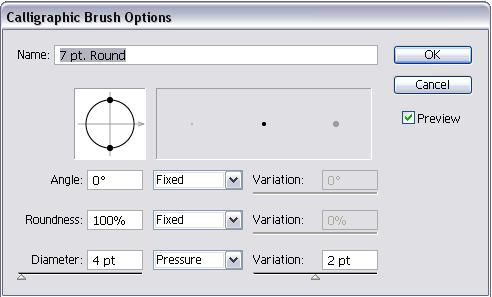
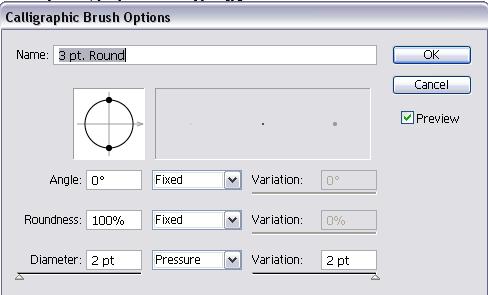
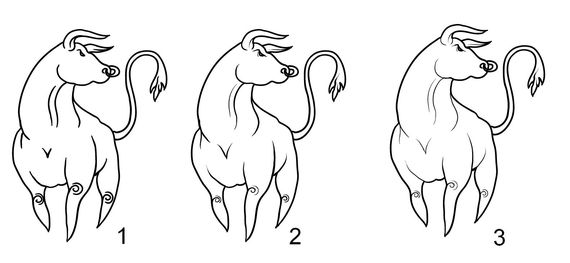
In other words, the variation must be half the diameter for the contour brush and 100% variation for thin lines, because we don’t want any blunt ends. Here are differences of how a single brush affects the entire outcome. 1 is made with the 4 px brush, 2 is made with 4 px for contour and 2 px for inner details, 3 is made with 4 px contour and 1.5 px inner details. See how much it’s affected by just a tiny setting ?

bull sketch Quick Tip: Free hand drawing brushes setup for Illustrator

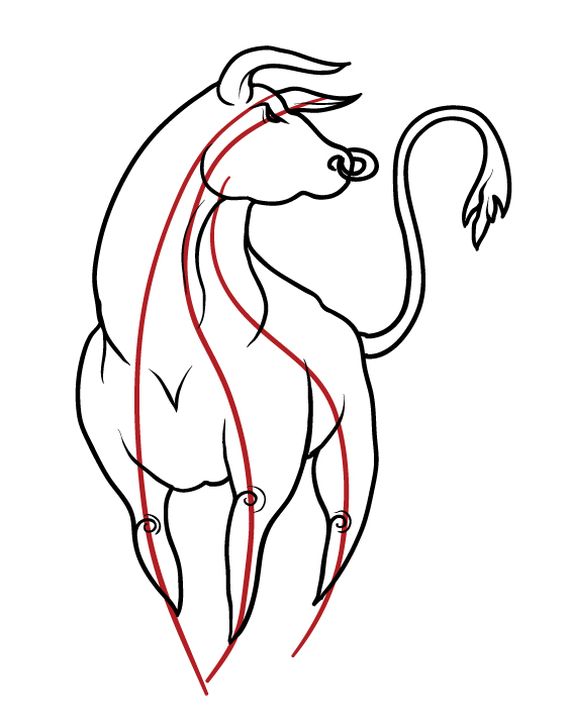
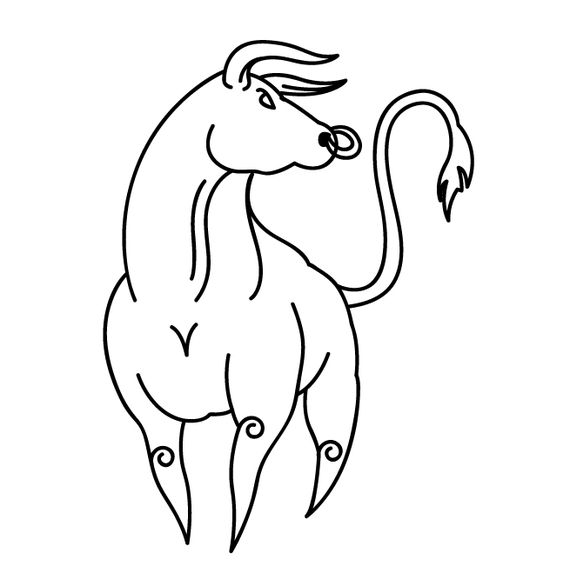
Also if you want your drawings to look good, make sure you have a nice line flow, so your attention doesn’t get distracted by blunt areas, un-natural curves and messy areas. When drawing, the rules of aesthetics of a casual viewer do not apply, the graphic language is different and does not count on photorealism. See below the lines i followed to create this character.

bull sketch flow Quick Tip: Free hand drawing brushes setup for Illustrator
I traced the image with the Pen Tool using the same contour brush as above. Notice how blunt and boring it is ? Although it has perfect lines, it does not please the eye with that variation in thickness and produces confusion, and there is a lack of artistic, free-hand touch.
bull sketch path trace Quick Tip: Free hand drawing brushes setup for Illustrator
0saves


If you enjoyed this post, please consider leaving a comment or subscribing to the RSS feed to have future articles delivered to your feed reader.

Related Posts

pixel77-free-vector-satisfaction-guaranteed-verisign-0524-220

Free Vector of the Day #343: Satisfaction Guaranteed Verisign

pixel77-free-vector-colorful-banners-0523-220

Free Vector of the Day #342: Colorful Minimal Banners

pixel77-free-vector-discount-banner-0522-220

Free Vector of the Day #341: Discount Banner

Successful-freelance-web-worker-increase-productivity-reduce-stress-THUMB

The Successful Freelance Web Worker: Increase Productivity and Reduce Stress

5 Comments

  1. Natalie

    03.26.2010

    Reply

    Great tip! Although when I try it the drop-down box to select Diameter as Fixed, Random, Pressure, etc has all but Fixed and Random greyed out. Am I doing something wrong?

    • Doink

      03.26.2010

      Reply

      Perhaps your tablet is not pressure sensitive or does not have the right drivers for it to be recognized as pressure sensitive? Please check.

  2. Shurandy Thode

    03.27.2010

    Reply

    Great tip thanks for sharing.

  3. Manuel

    04.11.2010

    Reply

    Oooh, I thought i could put that settings but i noticed that i need a tablet haha ):
    so bad

  4. Clippingimages

    08.08.2010

    Reply

    Sketch is really cool..i love the work ..thanks for sharing ..

Leave a Reply


Read Next