How To Create a Movie Poster in Photoshop And Paint Tool SAI
Today we will create a movie poster inspired by “Legend of The Guardians: The Owls of Ga’hoole” movie using Photoshop, stock photos, brushes, and Paint Tool SAI – a free drawing application, similar to Photoshop but with a lot fewer technical features and more settings for brushes.
Difficulty: Intermediate
Completion time: 2-3 hours
Tools: Photoshop, Paint Tool SAI
Resources:
– owl by FurLined
– castle by LilyStox
– moon by wachowicz
– mountain by ForsakeWolf
– birds brushes by Design TNT
– rust textures by Design TNT
By following this tutorial you will learn how to:
– create cool compositions for your designs
– define a color palette
– extract objects from pictures
– use adjustment layers
– use blending modes
– retouch images
– use blending modes
– add texture to objects
– create textured backgrounds
Final Image Preview

Before we start, there are a few things we need for this to go smoothly. First, research! Google some posters, covers, banners, whatever you find will be OK. Now let’s take some notes on the characteristics of these characters!
– realistic body shape
– metallic claws and helmet
Helmet’s characteristics:
– embossed flowers on the surface
– defined by round shapes and sharp corners
– rusty
– small dents
– reflective surface
Based on these traits, we can start working on our composition. At the moment, we just want to establish the tones in the composition, regardless of details or color palette. I use a black-and-white adjustment layer to show everything in grayscale.
Overall, the owl will have a dominant dark tone, since it will be the closest element, so we’ll need a light background to contrast with it. Also, we will need a clean area to add text, so I guess the bottom area will do nicely and will provide a nice stability element for the entire design.
This is how the design would look in grayscale and no details.
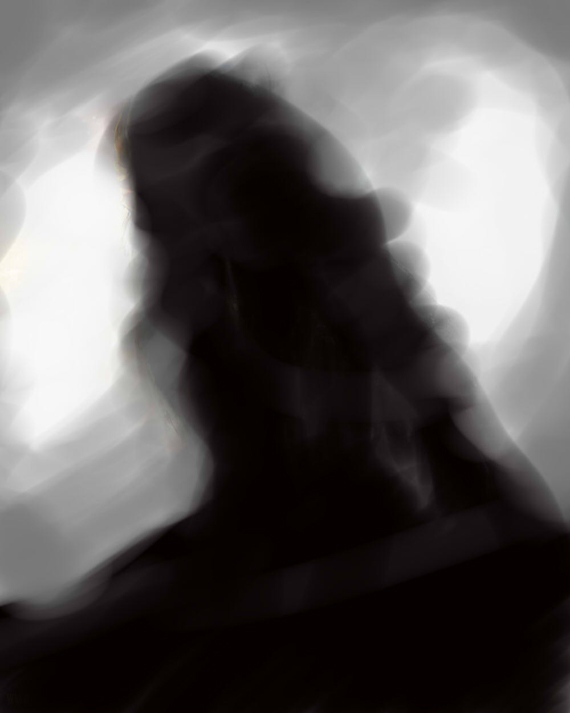
Now that we have a composition in mind, let’s start shaping it up!
Step-by-step tutorial on how to create a movie poster in Photoshop:
STEP 1: Open the file
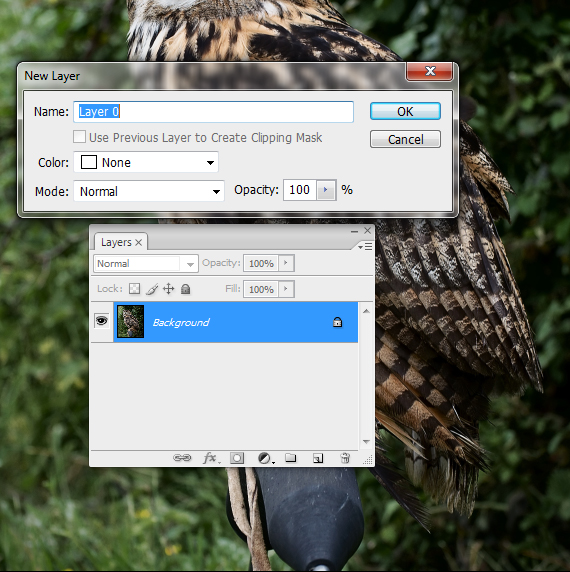
Open the “owl” picture (File > Open…). In the Layers palette (F7), double-click the lock near the layer thumb and hit OK. The layer is now called “Layer 0” and it’s editable.
STEP 2: Use Brush Tool
Hit Q to enter Quick Mask mode. Now grab the Brush Tool (B), set its Hardness to 100% and opacity to 100%, and paint over the owl. Use a large brush to cover the inner area, then use a small brush for the tiny details.
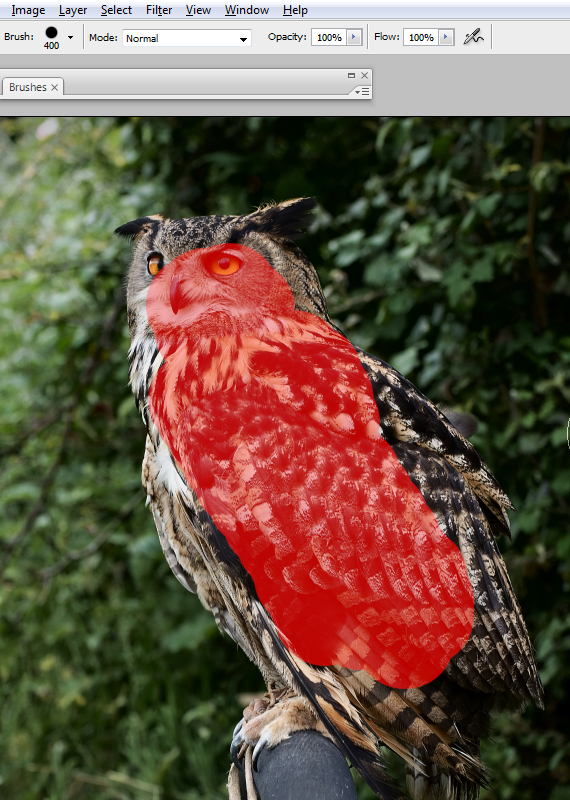
STEP 3: Use Quick Mask
Hit Q again to exit Quick Mask mode and go to Layer > Layer Mask > Reveal All.
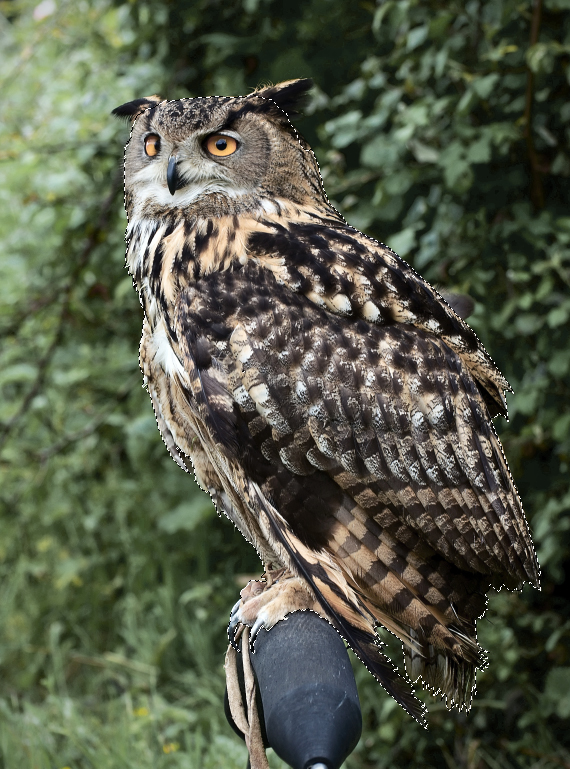
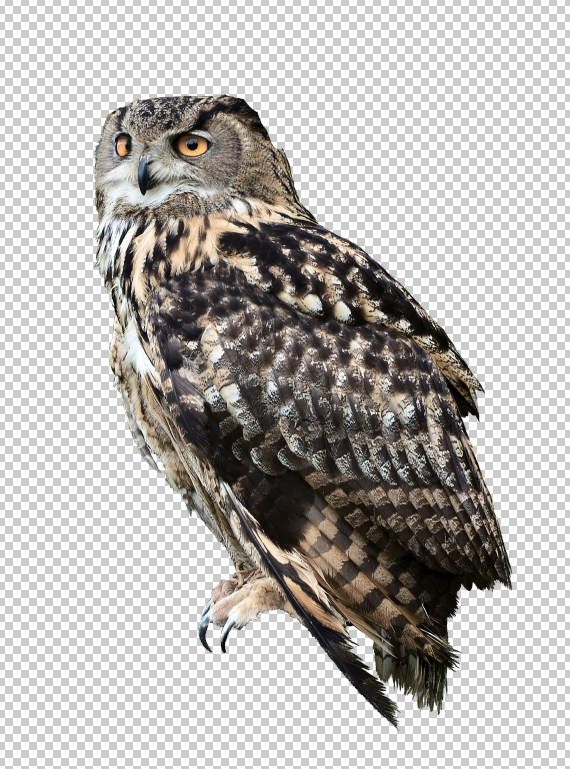
STEP 4
Rename this layer “Owl base” (Layer > Layer Properties…) and hit CTRL+G to place it in a layer group. Rename the group to “Owl”.
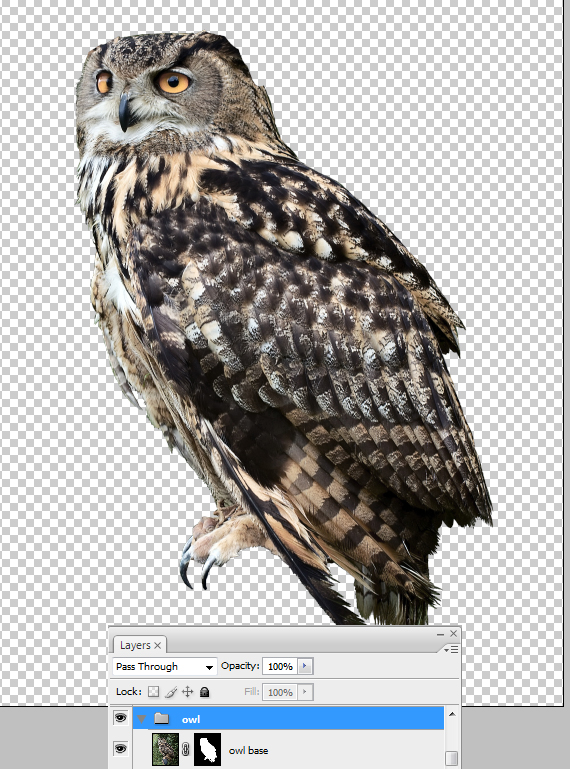
STEP 5
Create a new layer (Layer > New > Layer or CTRL+SHIFT+N). Name it “sketch”.
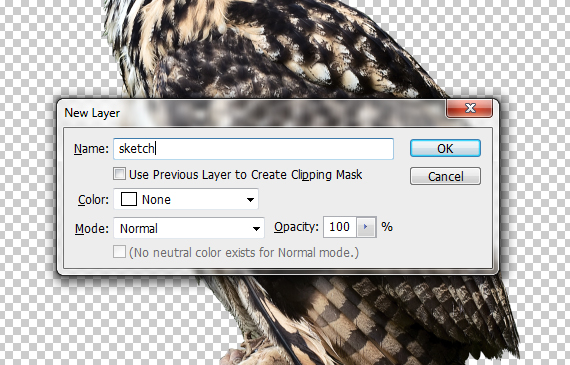
STEP 6
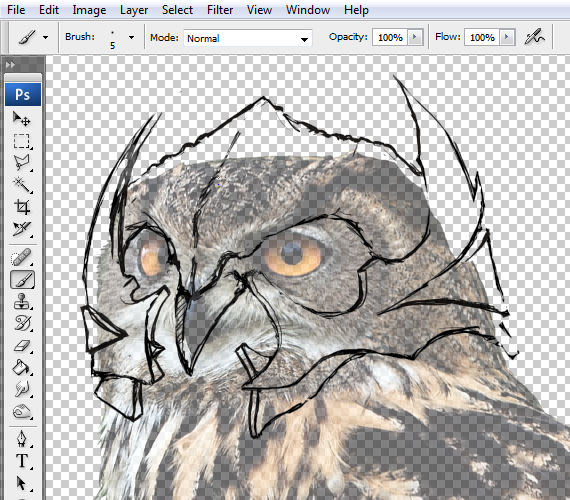
Grab the Brush Tool (B), make it thin (5 px), and let’s begin shaping up the helm. You can either look up one of the characters (mine was Metalbeak – yes, the villain) or shape your own, custom design. The secret to a good design is to find shapes to complement the ones near or below it. This way, you create organic bonds between them and make them blend in seamlessly.
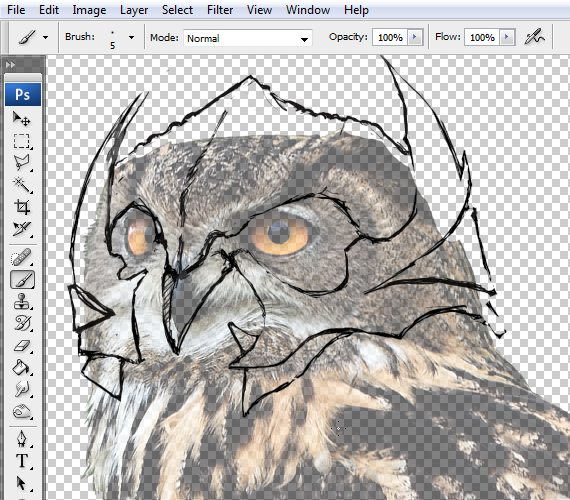
STEP 7
Take the sketch further and add volume and some major details. Again, keep it a sketch, don’t bother drawing very smooth and clean lines.
STEP 8
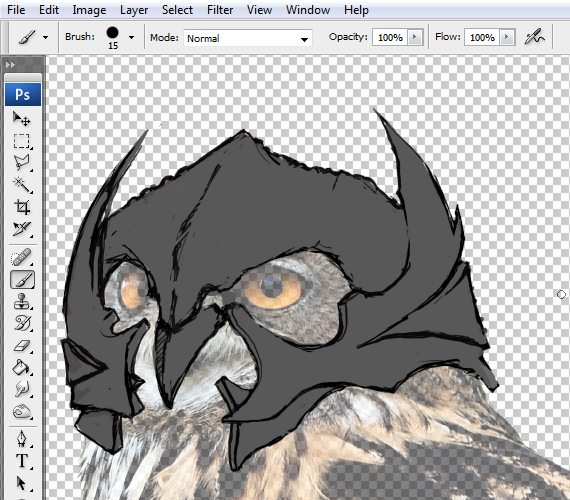
Create a new layer, name it “base color” and hit CTRL+[ to place it below the sketch. Now grab the Brush Tool (B), set the Foreground color to a midtone gray, and fill the entire shape.
This will be the drawing base for the shadows and highlights. It’s like working with toned paper, but the medium is a digital canvas.
STEP 9
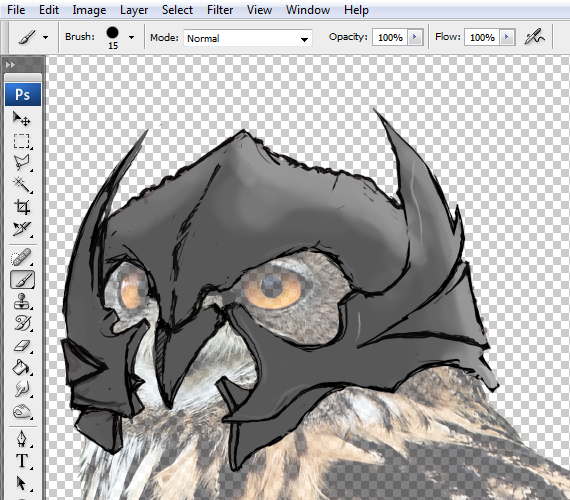
Create a new layer, name it “highlights base” and ALT-click between it and the layer below it. Set its Blending mode to Soft Light, hit D, then X. Grab the Brush Tool (B), set its Hardness to 0% and Opacity to 40%, and paint the soft highlighted areas.
STEP 10
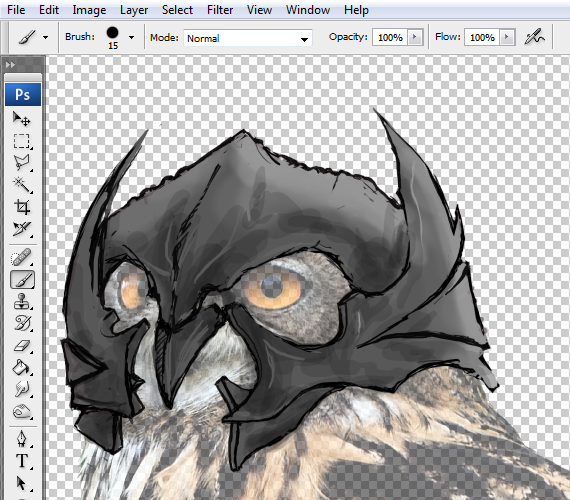
Repeat STEP 9 for the shadows, but set the Blending mode to “Multiply” and name the layer “shadows base”.
STEP 11: Create a New Layer
Further, create a new layer and name it “details base”. Pick a darker gray tone, set the brush’s Hardness to 100% and Opacity to 100%, and draw curved, thick lines like below. Make sure they have sharp ends – you can use pressure-sensitive brushes for them.
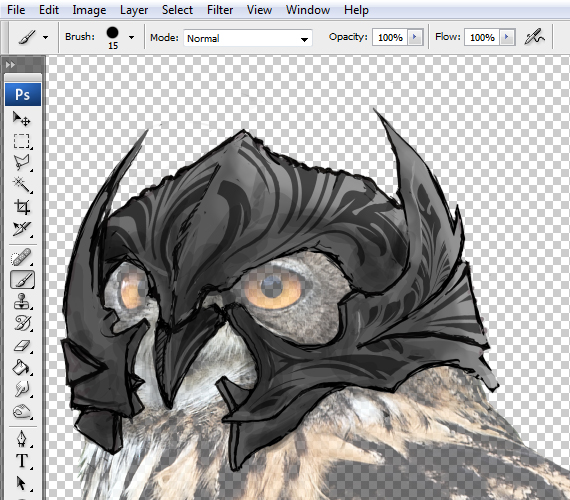
STEP 12: Repeat previous steps
Repeat STEPS 9-11 to create shadows and highlights for the details base.
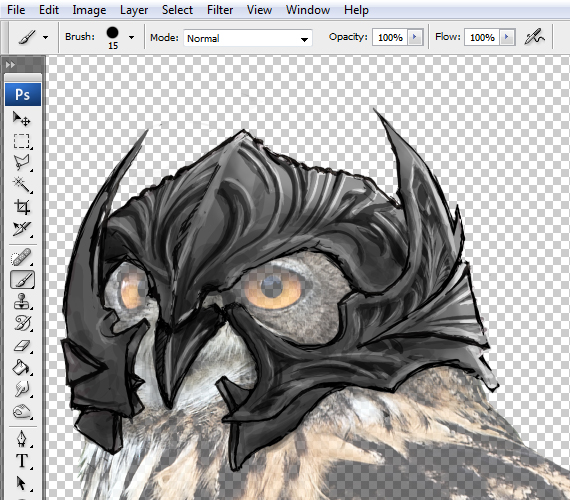
STEP 13 Create a new Layer
Create a new layer and name it “gloss”. For this layer, draw thin, bright lines only where the reflection is strong. Leave the Blending mode set to “Normal”.
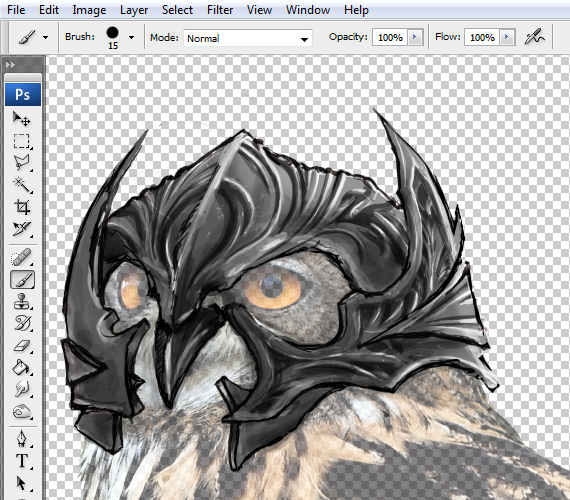
STEP 14: Select the Layers Group
Select the layer group and go to Layer > Layer Mask > Reveal All. Grab the Brush Tool (B) and paint over the extra areas.
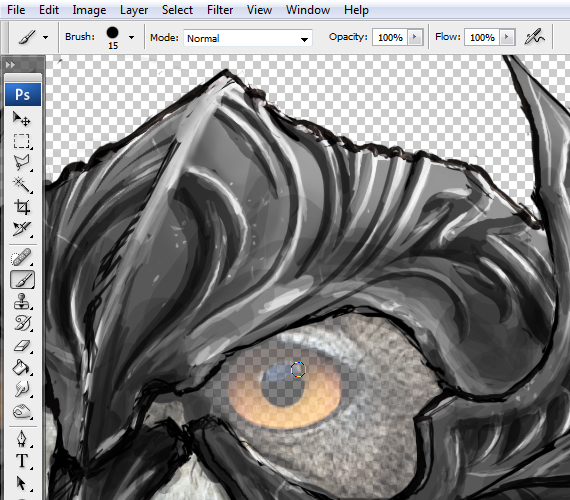
STEP 15
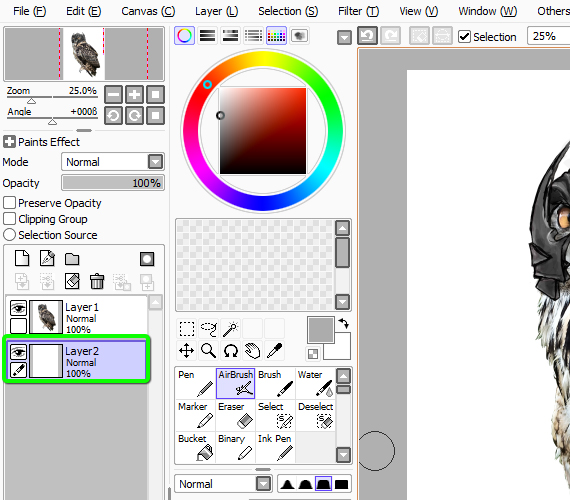
Go to File > Save As… and save it as a .png file on your desktop. Launch Paint Tool SAI and click-drag the .png file into SAI. Create a new layer and place it below “Layer 1” (CTRL+[ ).
STEP 16
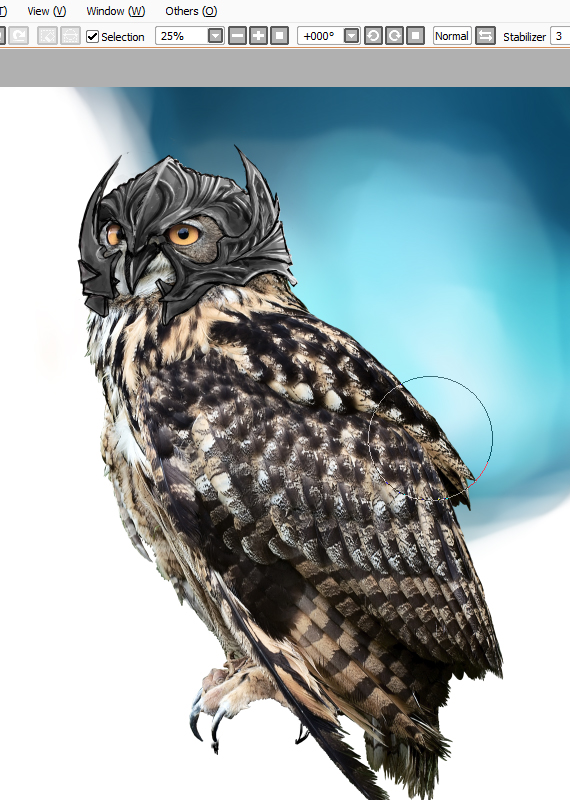
Grab the Brush Tool (B), set it to Watercolor, pick a saturated sky blue color, and paint the area shown below. Change the color to lighter tones for the center area and darker tones for the edges. The color intensity is controlled by the pen pressure, use this to create dark tones faster.
STEP 17: User Colors
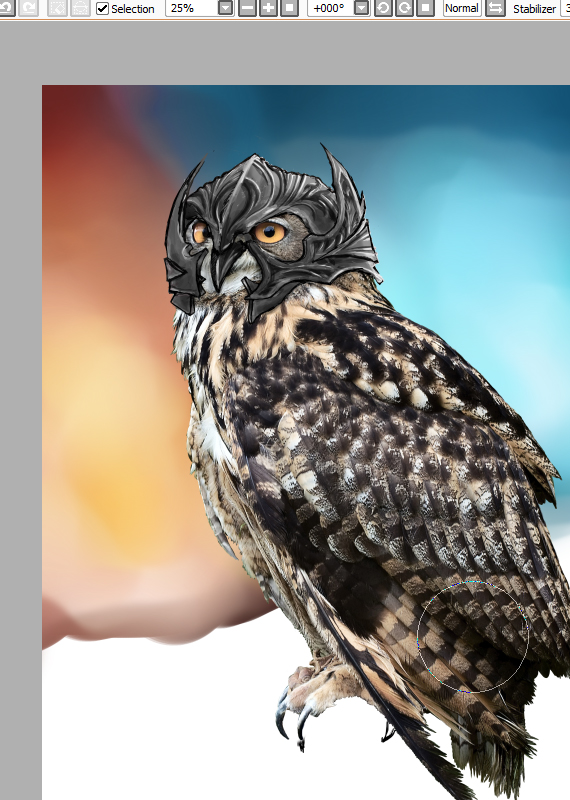
Repeat STEP 16 for the left side, but use orange and dark red tones.
STEP 18: Fill the Bottom Area
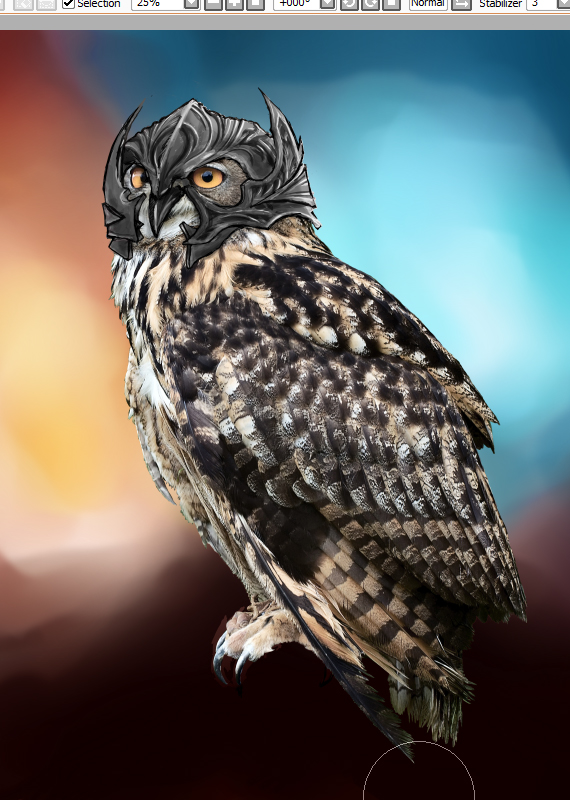
Fill the bottom area with dark red, like below.
STEP 19: Turn Off the Visibility
Turn off the visibility of the “Layer 1” layer and save the image.
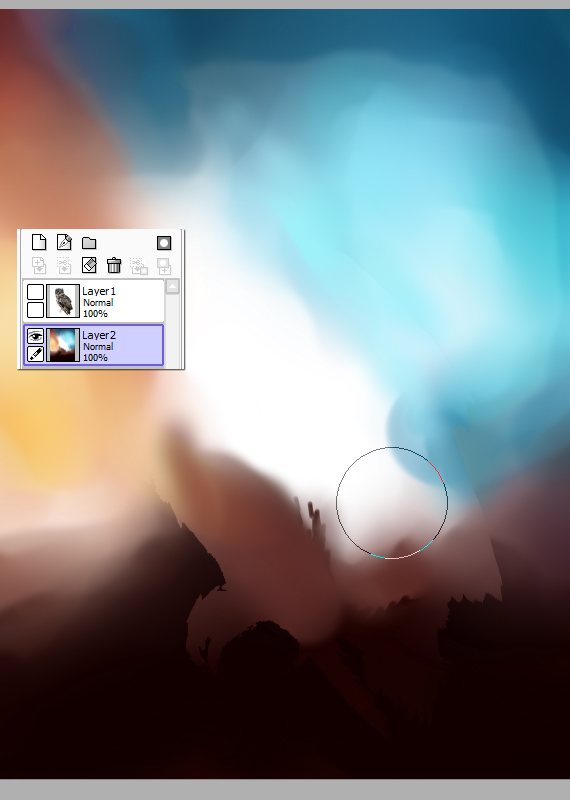
STEP 20
Open this image in Photoshop, select it, copy it, and paste it into our drawing. Hit CTRL+SHIFT+[ to send it back.
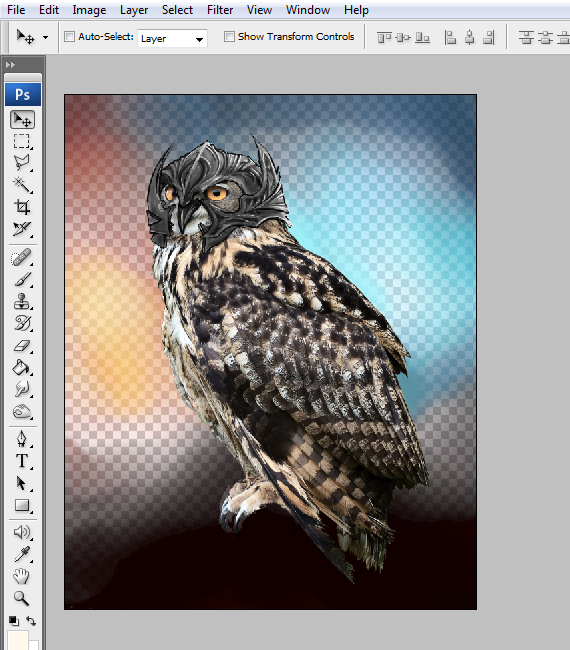
STEP 21
Create a new layer, grab the Paint Bucket Tool (G), and fill it with white. Hit CTRL+[.
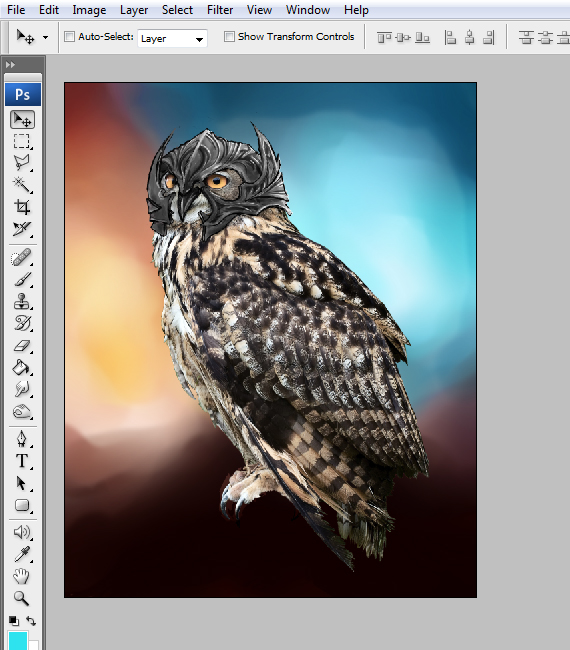
STEP 22
Open the “rust texture”, copy it, and paste it into our drawing. Place it below the layer group, go to Image > Adjustments > Desaturate (CTRL+SHIFT+U), and set its Blending mode to Soft Light. Do the same for the other texture, but place it above the layer group and erase any extra areas.
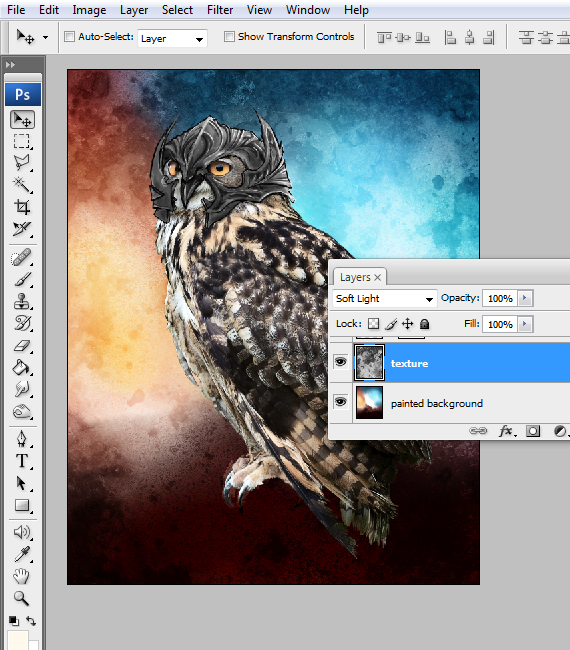
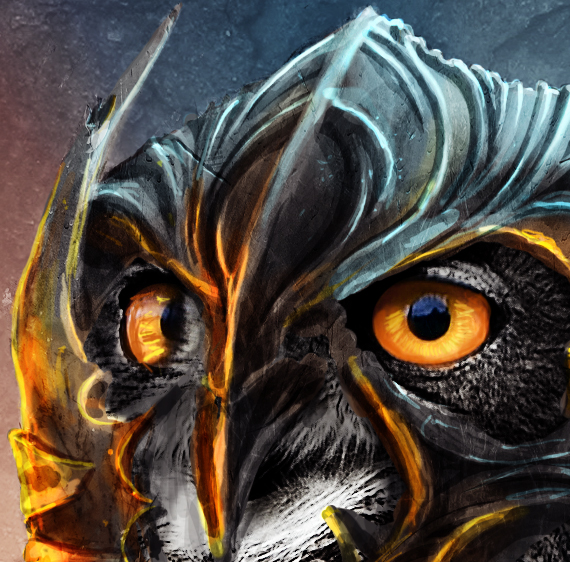
STEP 23
Now we have an idea for the color palette, so let’s build the main element around it. Create two new layers and set their Blending mode to Overlay and low Opacity. Now grab a light blue color and paint some soft blue tones on the helmet. Don’t work on any details yet, just go for a better overall look.
NOTE: You can also turn off the visibility of the grayscale lights and paint them again but with colors this time.
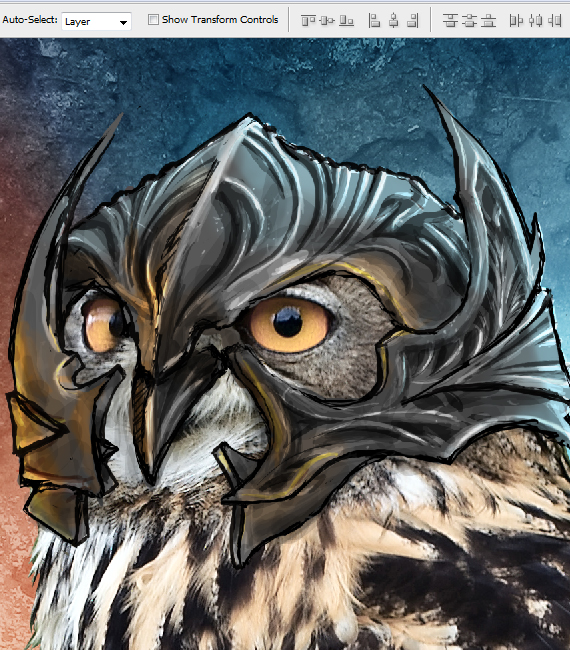
STEP 24
Turn off the visibility of the “sketch” layer, select the second layer created in STEP 23, and paint the right outline with a bright blue.
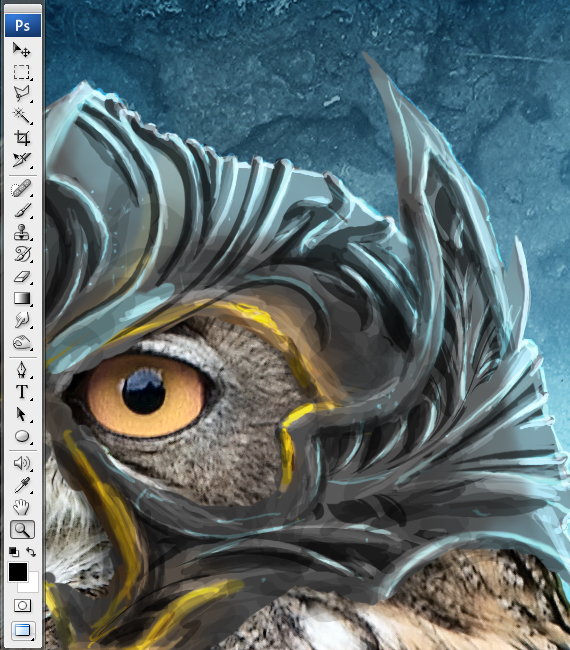
STEP 25
Repeat STEPS 23-24 for the left area, but use orange, yellow, and bright red tones. Also, use orange and yellow to make the eyes stand out more. Use very bright colors.
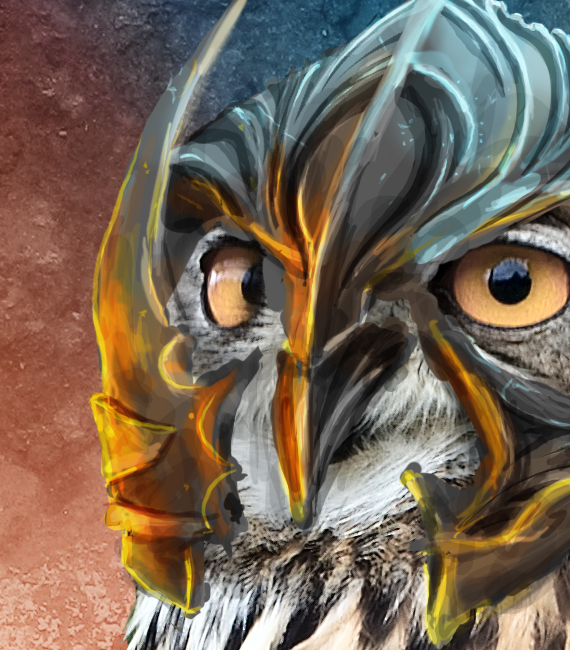
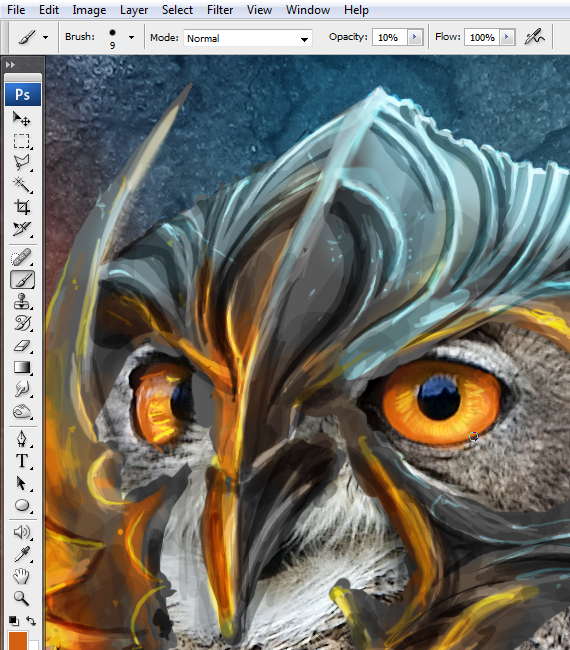
STEP 26
Select the “owl” layer and duplicate it twice (CTRL+J). Select the first copy, go to Image > Adjustments > Desaturate (CTRL+SHIFT+U), and set it’s Blending Me to “Multiply”.
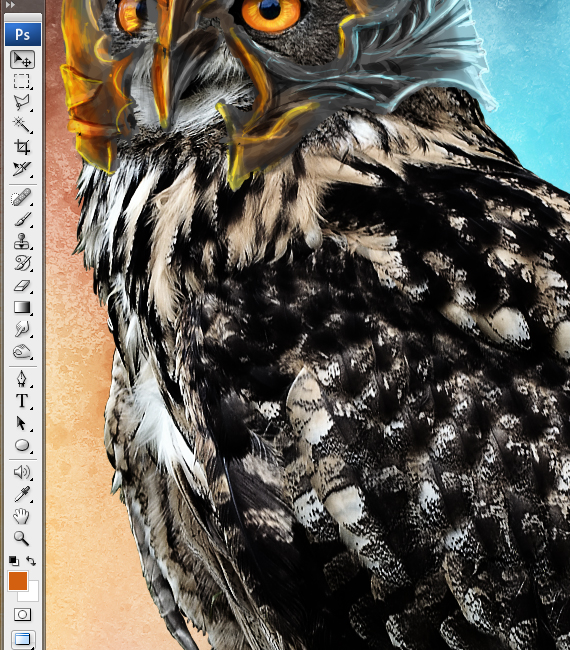
STEP 27
Select the second copy and go to Filter > Other > High Pass. Use a 3 px setting and hit OK. Set its Blending mode to “Overlay”. Create a new layer (CTRL+SHIFT+N) name it “reflected light” and set Blending mode to “Linear Light”.
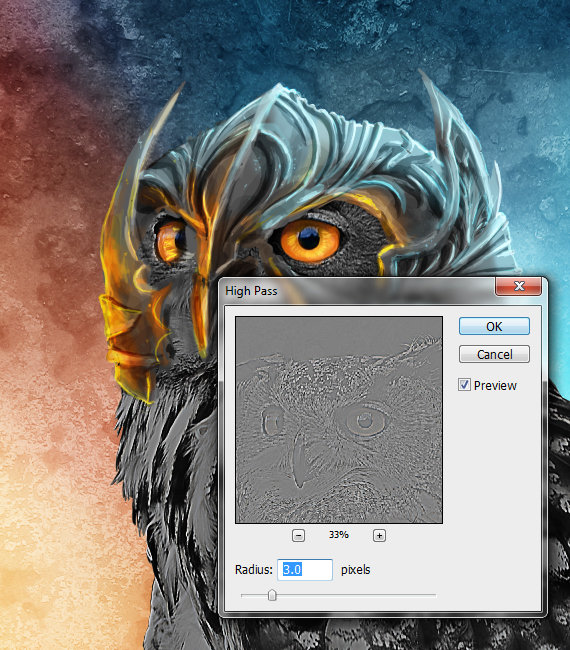
STEP 28
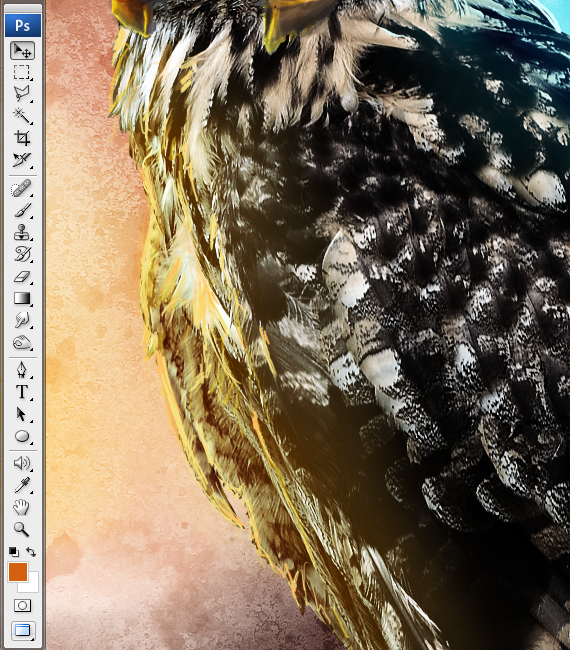
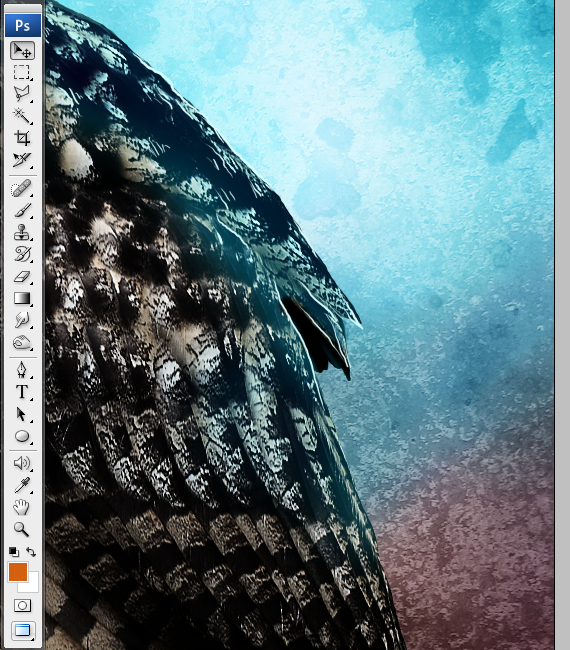
Grab the Brush Tool (B), set its Hardness to 0%, and paint orange and blue light spots on the owl’s body. Set the layer’s Opacity to 40% and create another layer and name it “body gloss”.
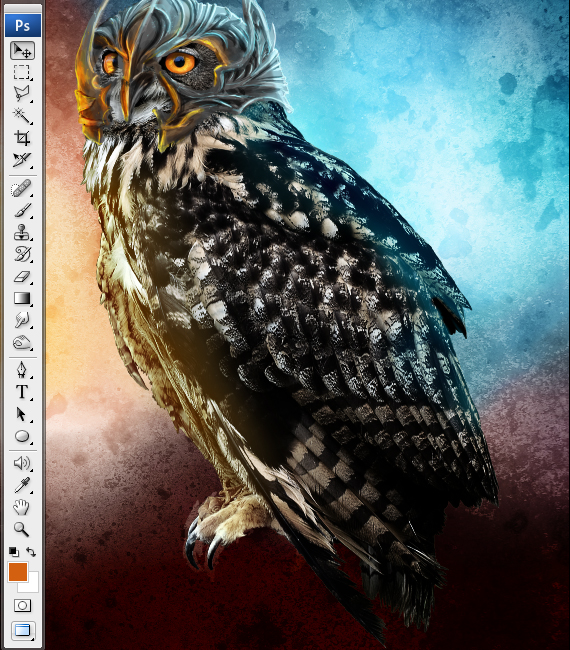
STEP 29
Draw thin lines on the owl’s body outline. Use bright colors and a round, hard brush.
STEP 30
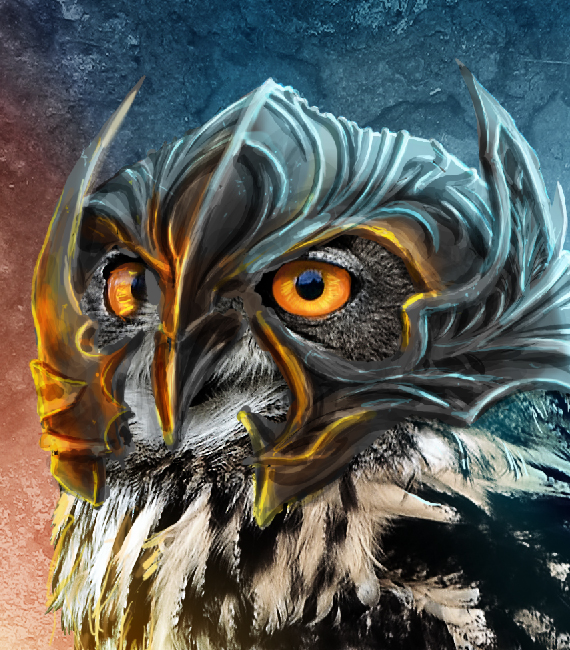
The helm needs a bit more contrast, so create a new layer above the base, set its Blending mode to “Multiply” paint paint more shadows.
STEP 31
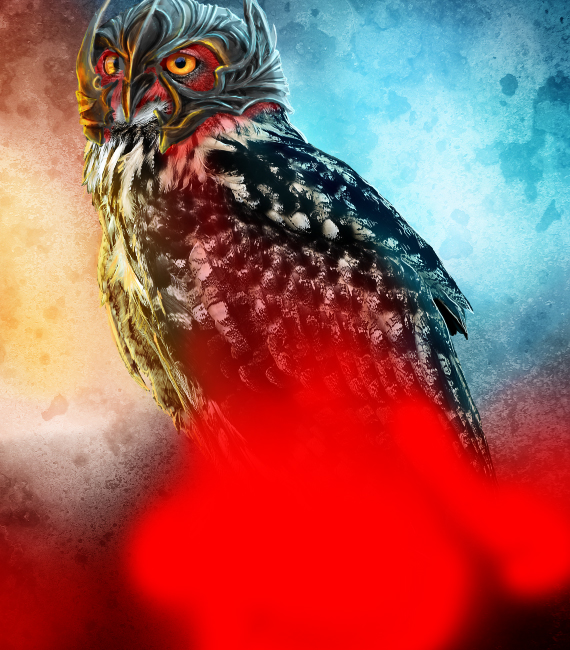
Select the topmost layer and create a new layer. Now grab the Brush Tool (B), select a dark red color, and paint the area below. Use a soft, round brush.
STEP 32
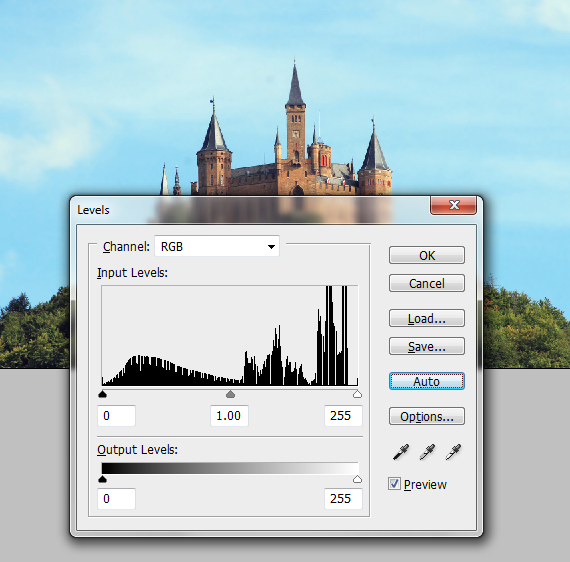
Open the “castle” picture, crop it to remove the frame (C), and double-click the lock in the Layers palette (F7). Hit CTRL+L and click the “Auto” button. Hit OK.
STEP 33
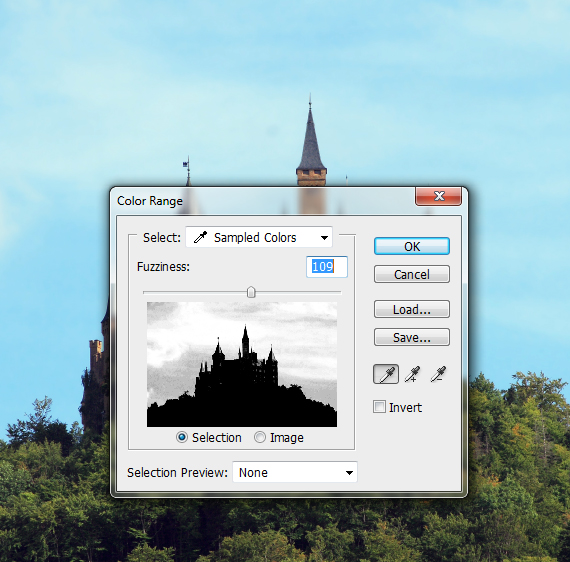
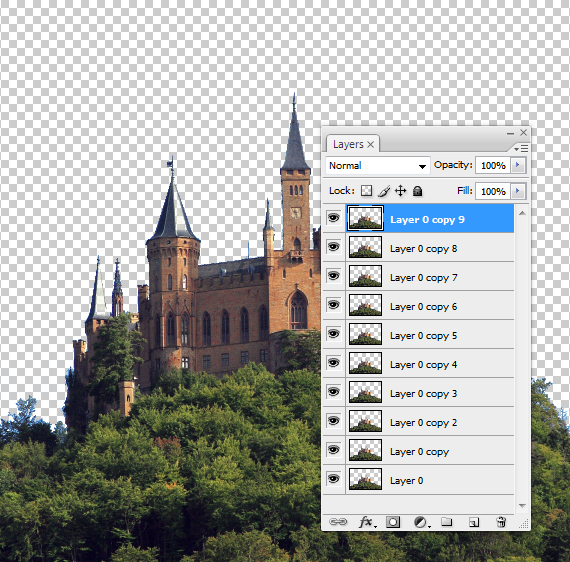
Go to Image > Color Range and click the sky. Increase the Fuzziness a bit and hit OK. Hit Delete, then CTRL+D, and duplicate the layer a few times (CTRL+J) to cover any accidental transparencies.
STEP 34
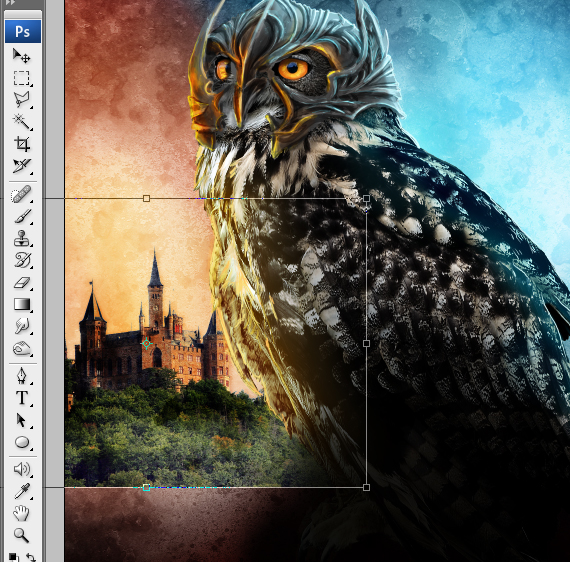
Go to Layer > Merge Visible (CTRL+SHIFT+E). Select the image (Select > All or CTRL+A), copy it (CTRL+C), and paste it into our document (CTRL+V). Resize it like below.
STEP 35
Hit CTRL+U, set Lightness to -100, and hit OK. Set the layer’s Blending mode to “Soft Light”. Go to Filter > Blur > Gaussian Blur. Use a 3 px setting and hit OK and a soft brush to erase the bottom area.
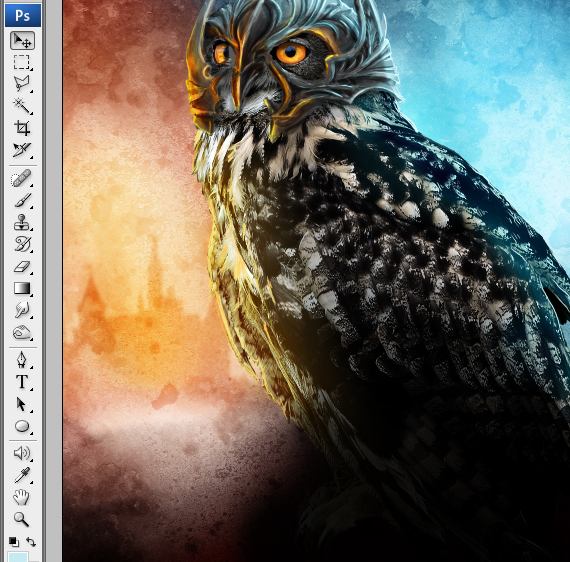
STEP 36
Repeat STEP 32 for the moons. Hit CTRL+U, check the “Colorize” button, set Lightness to +1, and play with the Hue and Saturation settings till you get a blue tint, then apply a 3 px Gaussian Blur. Leave the Blending mode set to “Normal”.

STEP 37
Open the “mountain” picture and paste it onto our document. Resize it, place it like below, and set its Blending mode to “Multiply”. Mask the extra areas, like below. Do the same for the right side, but reflect the image. Also, mask the extra area of the moon.
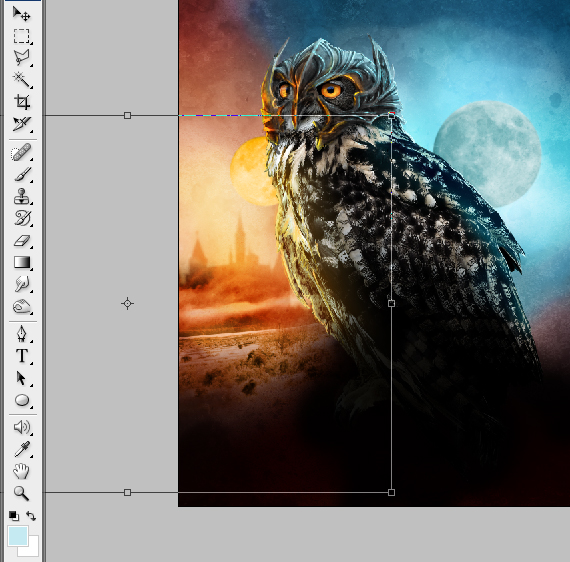

STEP 38
Select the “owl” layer group and go to Layer > New Adjustment Layer > Brightness/Contrast and Black & White. Use the settings below.
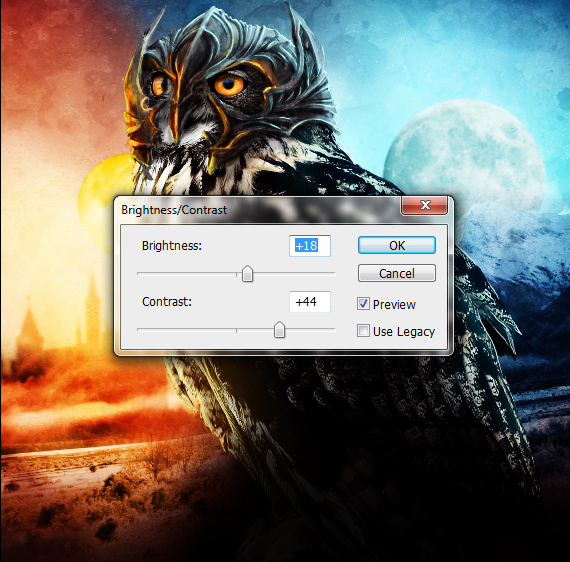
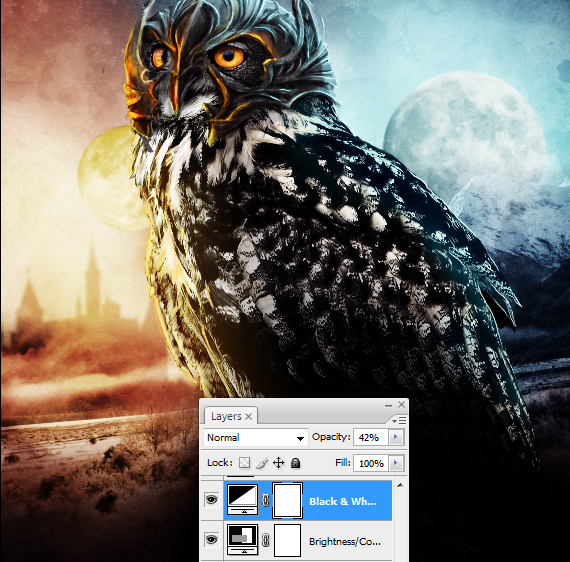
STEP 39
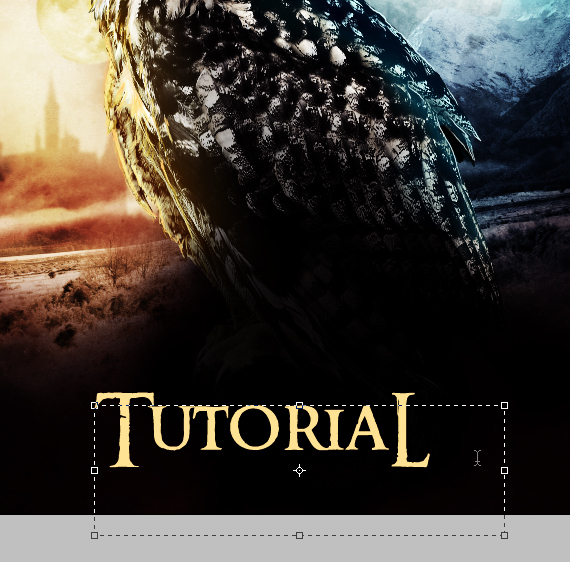
Install the “Ringbearer” font. Now grab the Horizontal Type Tool (T), draw a text box, and type in your desired text. Make sure the first and the last letters are capitalized. Change the font to “Ringbearer”.
STEP 40
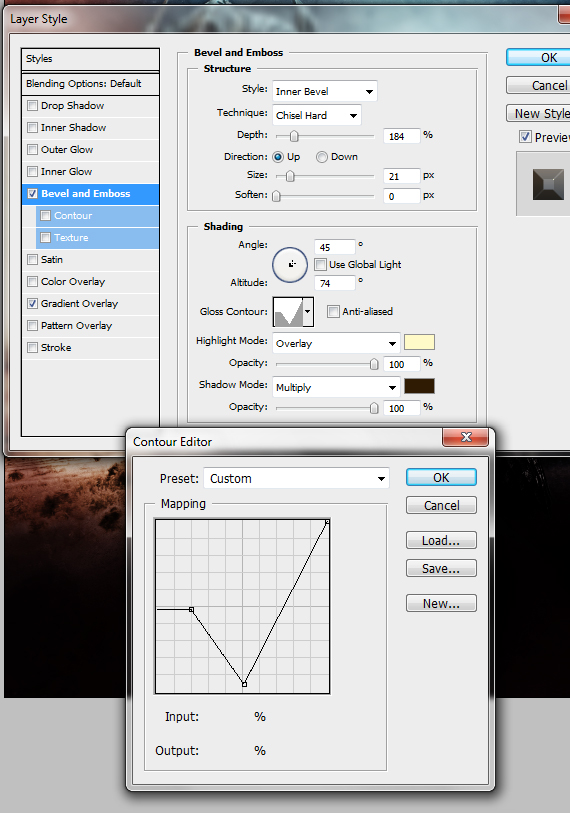
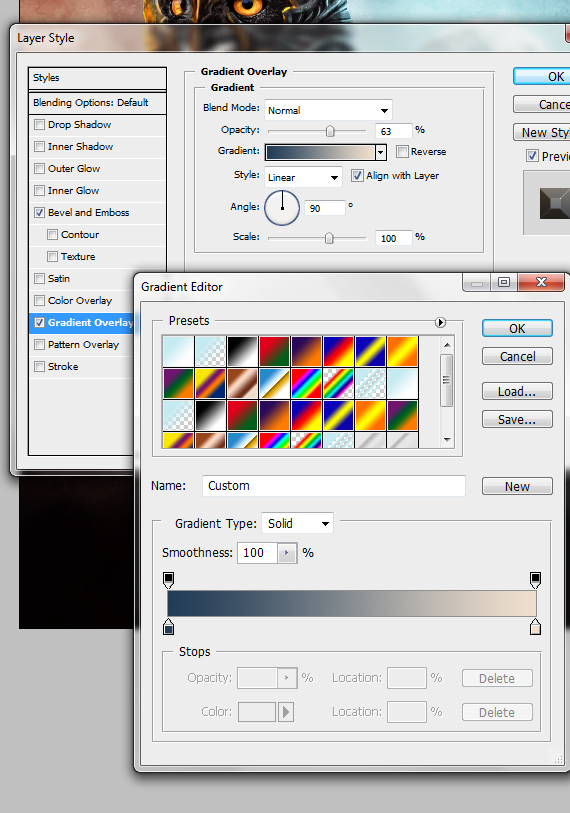
In the Layers palette, click the “fx” button and select “Blending Options”. Use the settings below.

STEP 41
As a finishing touch, use the “birds”, “clouds” and the default brushes to add small details to the background, such as feint clouds, flying birds, and glinting stars.

STEP 42
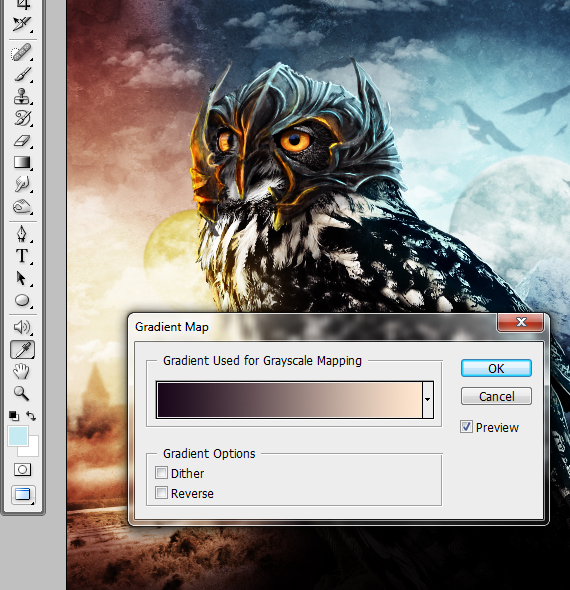
Select the top-most layer and go to Layer > New Adjustment Layer > Gradient Map. Use the settings below.
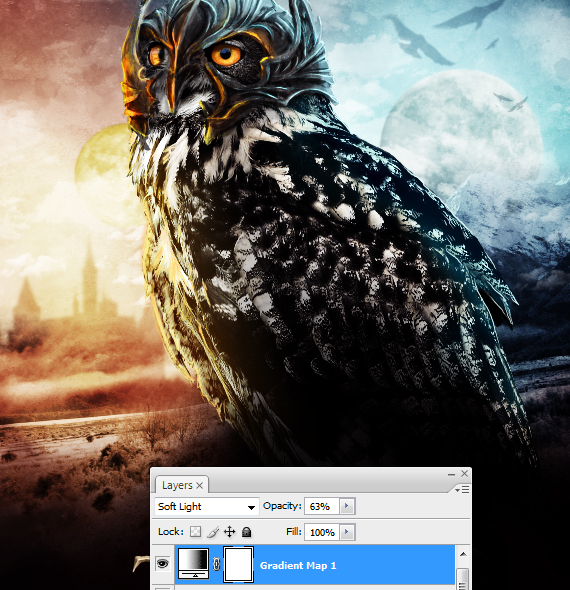
Done!

Download source file:
[download id=”181″]
Amazing tutorial, Great work you have done! thanks for this all :)
Realy great tutorial, might going to try this one!
Great work!
This tutor is exact a guideline to 1 of my passion for image editing.thanks 2 d writer
very interesting idea, and the result looks great. thanks for sharing!
super good
I like that …
Great work, I like style of it. Keep up a good work!
There was an issue with downloading the source file. Now Fixed!
hello I realise this is nearly two years down the line from your last comment but as of today (27/09/13) there is still an issue with the source file download. Shame this was a very interesting tutorial
Hey! I loved this poster. Can you please fix the download link? I tried to recreate this, and it simply does not happen. Many thanks!
Hi my friend! I wish to say that this article is awesome, great written and come with almost all important infos. http://www.gamesfor.co I’d like to peer more posts like this .
Love it. You should do a video tutorial to this.
nice work
Loved this. But I’m not able to replicate the colour background as yours, in SAI. I’d be delighted if the background image could be shared. Could the resource link be updated please?
Brilliant work!