Photoshop professional retouching techniques
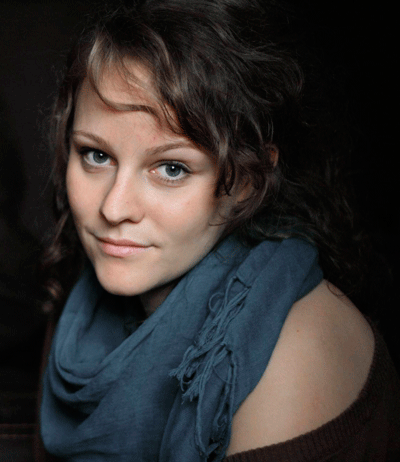
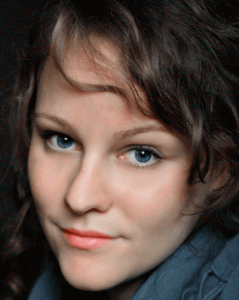
Today I will walk you through some easy techniques that will help you bring a photo to life. We will perform some basic and natural retouching and learn some new techniques along the way. In this tutorial I am using Photoshop CS 3 (for PC) and a great photo found on stock xchng.
Step 1
Open up the photo and use the crop tool to leave out the free space from the left that we don’t need.
Step 2
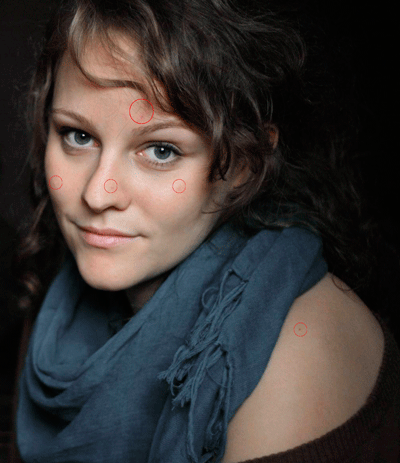
Now we are ready to start retouching the photo .We always start with the skin. So let’s smooth out the  little imperfections. The Spot Healing Brush is perfect for that. Just select it and click on the problem areas.
Step 3
Use the the Clone Stamp tool for the wrinkles located under the eyes. Hit 3 on the keyboard so that you are using a 30% opacity and make sure the effect is subtle. We don’t want to go to far.
Step 4
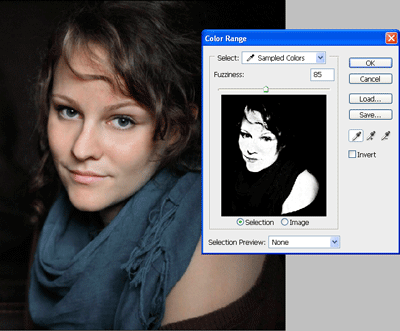
And now for the smoothing of the skin we will use Color Range. Go to Select/Color Range and click on any area of the skin , keep the Shift key pressed to continue adding tones  until you have something similar to this. A fuzziness of 85 is OK for this case.
Step 5
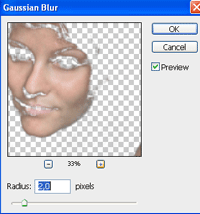
With the skin selected click Ctrl + J to copy the selection on its own new layer. Go to Filters/Blur/Gaussian Blur and give it a 2.0 Radius. Click OK.
So we’re done with the skin. And that was the trickiest part because it requires a lot of attention. Good job!
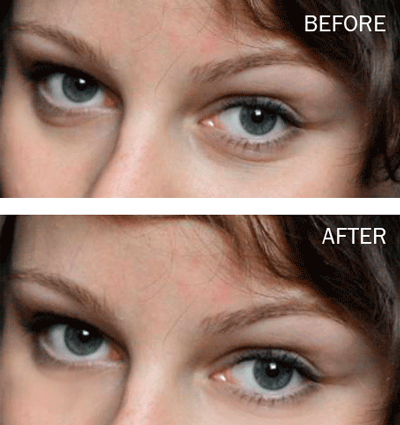
Step 6
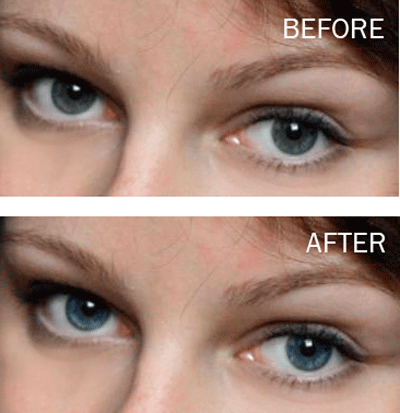
Create a new layer and set the mode to Overlay and zoom in on the eyes. Using white as your foreground color, choose a soft brush with an 8 px size and brush on the light areas of the eyes. Reduce the opacity of the Layer to about 20 %.
Step 7
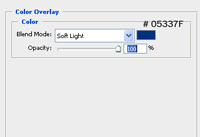
Let’s bring some color into the eyes. There are many ways to do that but today we will use color overlay . So make sure the overlay layer is selected go to layer styles and use the following settings:
Step 8
Create another layer. Change its mode to Soft Light choose Black as your color and brush again on the eyes , but this time focus on the darker areas.
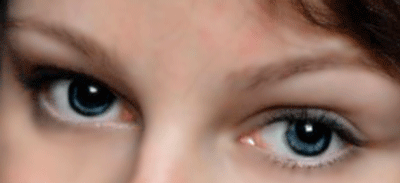
Reduce  the opacity of this layer to 20 %.
As you may have noticed the effects we used are very subtle . You always have to be careful when retouching a photo and make sure you use subtle effects to avoid an artificial look.
Step 9
Create a new layer on top of all the others. Change the mode to Soft Light. Choose a peach color for the lips (I’ve used # b35046) and paint on the lips with a soft brush. Reduce the opacity to 75 %.
Step 10
Use the same color but with a substantially larger brush to paint on the cheeks to give them a little color. Make sure you do this on a different layer with a Soft Light mode.
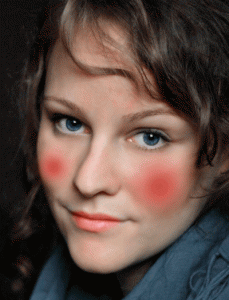
Lower the opacity to 15%.
Step 11
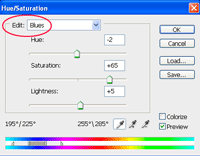
Before the final touches let’s make the shawl around the girl’s neck more appropriate with the whole picture. This is a good chance to learn a new and very useful technique. This will make your retouching job much easier. So just create a new hue and saturation adjustment layer.
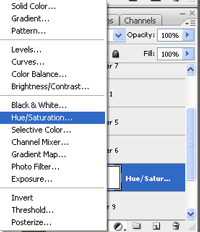
From the Edit Menu choose Blues and push the saturation to 65. You see how the color just pops, and we are only affecting the blue tones in our photos, as simple as that.

Step 12
And now we are ready for the final touches.
Create a new adjustment layer on top of all the other… but this time choose Curves. We want to bring a little more red tones and yellows to the skin, to complete our natural look.
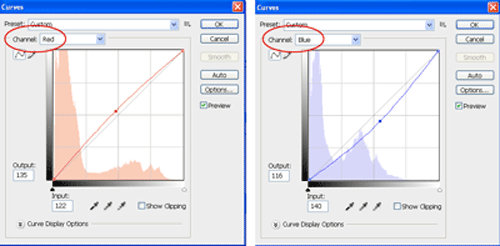
So on your Curves Menu first choose the red channel and bring the curve up a little perform the following settings.
Next, pick the blue channel and bring the curve down for some yellow tones. You can play around with the settings.
Search for the effect that better suites you. The Curves Adjustment Layer offers you infinite possibilities.
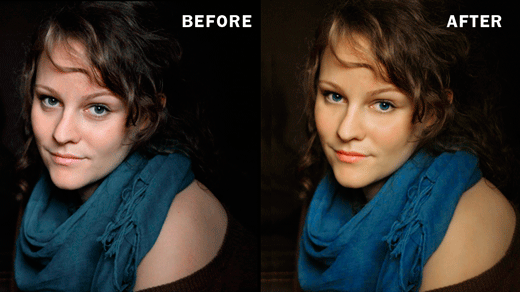
And you are about done! Â Hope you’ve find it useful and I’ll see you next time.

Do you want to learn more about how to work with Photoshop?
See our Illustrator and Photoshop tutorials. They are all FREE. Also check all Free Vectors Category.
Great tutorial!
thanks, very useful
lo podrias enviar o existe algun vinculo para leerlo en español
merge si cu masti succesive iar apoi sa reduci ebenele, dar in aceasta directie portretul capata in detaliu aspectul unei fete din plastic, ne-realista. OK sunt zeci de variante pentru a retusa optim un portret. Fiecare are stilul si tehnica sa iar daca lucrezi cu tablet totul devine mai simplu
great
thanks
wow
Did you use photoshop for this modification?
nice and great tutorialsss
Very simple and fun tips that really make a difference in a photo. thanks!
The gaussian blur technique for the skin, is not excatly what I would call ‘professional’ as it has a tendancy to turn people into ‘mannequins’.
You won’t find many, if any, professional retouchers using that.
nice tutorial , simple retouching is really good
nice and great tutorial,thanks ya
it was really good and very useful thanks
Thank you so much for this! Keep it up with the patiently explained tutorials and don’t get discouraged by no comments on your posts.