Glittery sparkles effect

Background effect
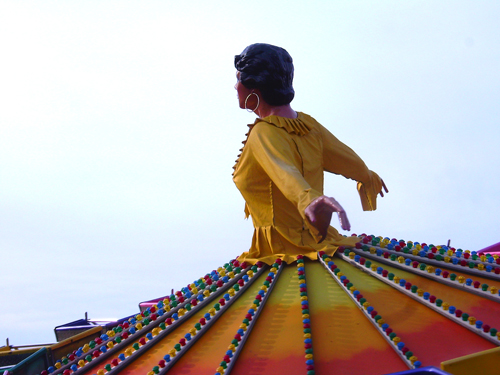
1. Open a colorful image in Photoshop. I used a photo taken a few years ago, i thought it was appropriate for this project.

2. Crop the most colorful part of the image, where’s the biggest diversity in color, and maybe a little black too.

3. Duplicate the layer (CTRL + J) by dragging and dropping the layer onto the create new layer icon.
4. We have to make the image to look kind of squared, so go to the Filter menu – Pixelate – Mosaic. I used a cell size of 15. You can adjust it depending on the image you’re editing.

5. Good! Now let’s go to Filter – Stylize – Find Edges

To make this image into a more rounded glittery wanna-be shape, we have to apply the Median filter->
6. Filter – Noise – Median. I used a value of 2.

The next step is to make the image darker, and make the glittery colorful shapes pop out.
7. Achieve this by inverting it (CTRL + I) Image – Adjustments – Invert.

8. Duplicate this layer using the shortcut CTRL + J or drag and drop the layer onto the create new layer icon.
9. Now change the blend mode to screen.

10. Apply a find edges filter. Filter – Stylize – Find edges

11. Invert the layer (CTRL + I) by going to the Image menu – Adjustments – Invert. Ok, now duplicate the layer twice and we’re on the right track.
12. CTRL + J x2 -Â duplicate the layer twice
13. Select the first layer (Layer1 Copy2 is the default name), and we’re going to give it a half-glittery look. This is the interesting part, so go to the Filter menu – Blur – Motion Blur. I used an agle of 45 and 155 distance, but you can use whatever values think its best.

14. If you think it looks kind of dull, and with a low color level, adjust the image by going to Image-Adjustments-Levels. Dial the settings until you come up with a brighter and shiny image.

15. Now, go to the Adjustments menu again and mess with the Brightness/Contrast a bit too, that will definetly get your image a bit more of shiny look.

We’re one step away from completing the background, so hang on a little bit more.
16. Repeat the steps 13,14 and 15, using the other layer (Layer1Copy – default name).
In this stage, all you have to do is select the layer below the top layer and apply the same settings, but with a minor change, and that is: a “-” minus in front of the value in the motion blur settings. Short and clear:
Filter-Blur-Motion Blur – 45 (or whatever angle you entered in the first place, but with a minus in front of it).
Image-Adjustments-Levels, then Image-Adjustments-Brightness/Contrast.
That’s pretty much it for the background guys! Now, if you’re not completely satisfied with the result, you can apply an adjustment layer to all of the other layer , and give the final image more life, or more glitter, or more whatever you think it is.
17. Image-Adjustments-Brightness/Contrast

Text effect
18. Merge all the layers, and rotate the canvas 90 degrees CW. To merge the layers you have to select all the layers, right click and choose merge all layers. To rotate the canvas you have to go to Image – Rotate Canvas 90CW.
19. Now type in some text. and rotate it about 45 degrees, or whatever suits you.
I used a white text and rotated it at about 45 degrees.

20. Rasterize the type (Layer-Rasterize-Type or right click the type layer and choose rasterize) then duplicate the background layer.
Now we have to clip the background to the rasterized type layer.
21. To do this you must first select the background copy layer, then hold the ALT key and move the cursor between the two layers until the cursor changes, then click! Now you have clipped the background copy to the type. Excellent work!

22. Merge the two layers (background copy and the one below it) and move it in the dark area of the image (where’s the case).

23. Duplicate the background layer (aren’t we all saturated with this duplicate thing?)Â and change the blending mode to screen, then dial down the opacity a bit (i used 60%).
24. Final step go to filter blur – motion blur, and use the same blurring distance as in the steps above. For the angle, use the same value as the rotation of the type.

You can always boost the colors if they seem too dull. I saturated my image with a value of 80 by going to Image-Adjustments-Hue/Saturation.
25. Finally, to give the text a more interesting effect, i duplicated the layer which I’ve saturated, and applied a radial blur with the following settings:
Spin, best and an amount of 28.

That’s it! Enjoy! But remember, you can ALWAYS improve your effect!…Photoshop offers us endless possibilities to do this.
Final image:

Do you want to learn more about how to work with Photoshop?
See our Illustrator and Photoshop tutorials. They are all FREE. Also check all Free Vectors Category.
You can’t even tell that that is the same picture. Interesting manipulation.
yeah! you are correct!
Stunning man! ;)
i love this!
thanks a bunch:) stay tuned for more
Awesome effect! Thanks a lot!
Great tricks Thanks
it reminds me of my old Lite Brite! Awesome!!!!
its coz its tured on the side . it is actually pretty recognizable otherwize .
I was just starting, I thank you very useful help
Nice tutorial, thx