Motion Shots – Hints & Tips for Beginning Photographers
A photograph captures a single moment in time. And it is the beauty of the ephemeral moment that makes it such an enduring and emotive art form. But what if you want to photograph wildlife in action, a car hurtling round a racetrack or the movement of tall grass in the breeze? If you know how to take motion shots, your images will come to life instantly. Here is a brief outline of how you can use different shutter speeds and panning to introduce movement into your photographs.
Be prepared to practice. Motion shots or motion capture photography takes time and patience – and a good deal of luck. And even then there is no guarantee you’re going to get it right every time. You need to really get to know your camera and learn how its shutter speed impacts on the outcome of your shots. A good eye and a tripod are always a big help too.
Blurring Motion Shots

One way of depicting extreme velocity is by blurring the subject of your photograph, while keeping the background in focus. An example of this would be a shot of a blurred racing car in the foreground with a pin-sharp spectator standing in the background. Or, as you can see in this example, a blurred cyclist against an in-focus backdrop of garages. To recreate this technique, use a slow shutter speed with your camera on a tripod to prevent wobbles.


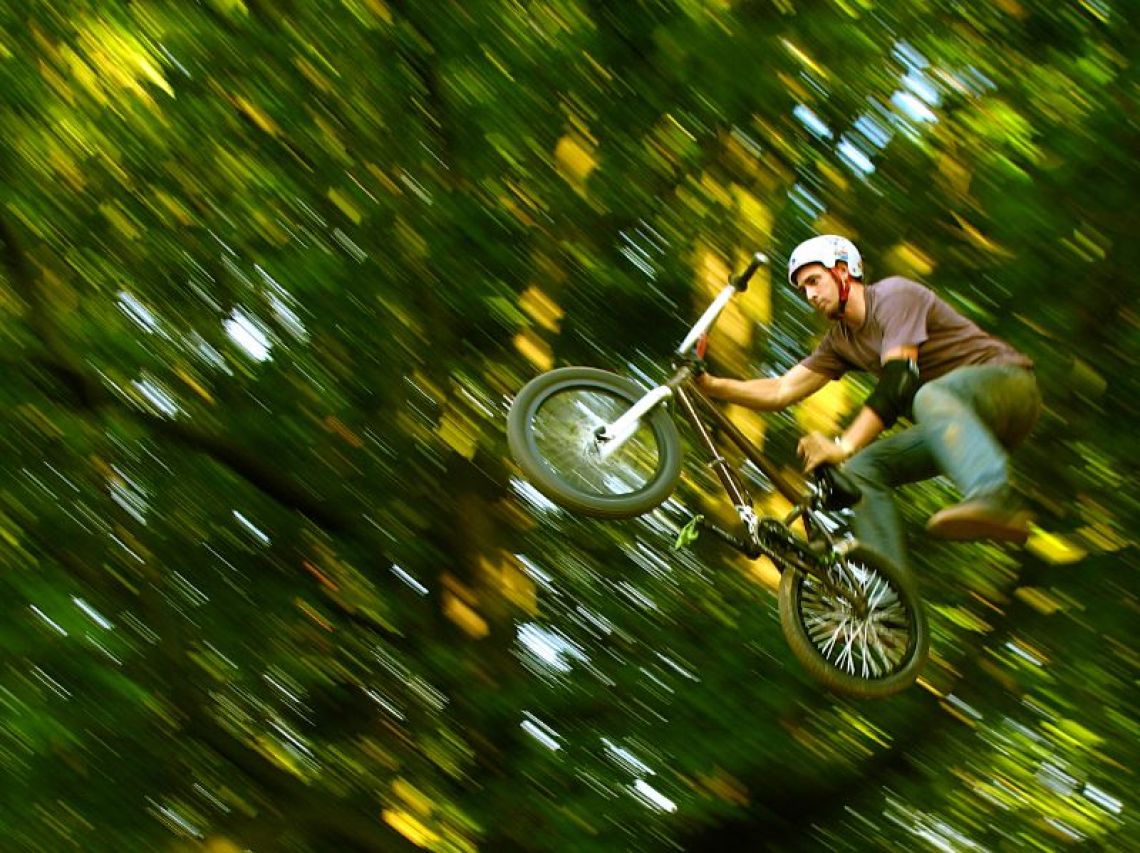
Flip this technique and you can get motion shots your subject in focus and blurring the background, as can be seen in this example. Like with the previous method, you need to use a slow shutter speed, however instead of resting your camera on a tripod you’ll be panning your camera in the same direction as your subject.


Panning Motion Shots
Panning is a technique where you move your camera with your subject. It breaks all the rules of traditional photography, namely that you should keep your camera as still as possible in order to obtain the best shot.

If you’d like to take a panning shot, like this one, you’ll need to keep your camera moving in the same direction. Remember to maintain the same pace at which your subject is moving. It’s a good idea to check if you have plenty of space around you to move before you set up. Make sure you have ample room to swivel your arm at a parallel axis to your subject.

It takes time to master panning shots. A good place to practice is at sports games, taking shots of the players and athletes. Once you’ve got the basics nailed, you can try to photograph your subject in enough detail to see their facial expressions and emotional reactions.
Continuous Shooting Motion Shots

Another technique for capturing motion is to use the continuous shooting feature on your camera. This will create sequential shots. The series of images created can then be join together in post production. You can see this in the cool skateboarding shot below.

There is no magic formula to finding the right shutter speed. You’re going to have to use your instinct and experience every time. Look at the speed your subject is moving. Estimate how far away you are from it and how much space you want to pack into your shot. And make a judgment call based on that.
As a rough guideline, the faster your shutter speed, the more sharply your subject will be in focus. Keep an eye on any excess light when using a slow shutter speed, though. It can creep in and spoil your shot. Try reducing the aperture size on your camera or reducing the setting of your ISO.
Editors Note: “This article was originally published in February 2013, and has since been revamped and checked for complete accuracy of information”
Great post ever. Very descriptive and understandable post. Useful and helpful for newbies. Thanks for the share.
Panning shots is quite difficult but is a crucial skill for motion photography. Thank you for sharing your tips.